Deschutes Inner Net Tent
Posted: Wed Aug 26, 2020 2:45 pm
In case anyone ever reads my myog posts and thinks 'he only puts these up to show off' then read on  I post my gear making as (hopefully) inspiration and also as tips for others...
I have a Deschutes tarp which down here I use with just my Borah Gear bivi, we don't have the winged death here so it's fine to blow up the mat, get out the quilt and get changed in the open. As I'm off to the land of the 'right to roam' I decided I might want to do something about that. Brushing your teeth whilst running in circles to avoid the midge is one thing but trying to blow up a neoair and run at the same time is a bit much.
I could have just bought the Serenity inner that Six Moon Designs sell but this is only about the size of a sleeping mat. Fine once set up but a bit tricky to sort your gear etc. plus it means that there is a triangular area at the back of the tarp with no access. So I measured the shape of the floor I wanted plus the height then drew it up on the CAD and worked out the sizes of the panels to cut. It would have a bath-tub floor with a 100mm upstand and a midge proof mesh upper. The upstand height was limited by the width of available fabric. The SMD has a 200mm upstand which might be the reason it's narrower, otherwise they would need a seam across the floor.
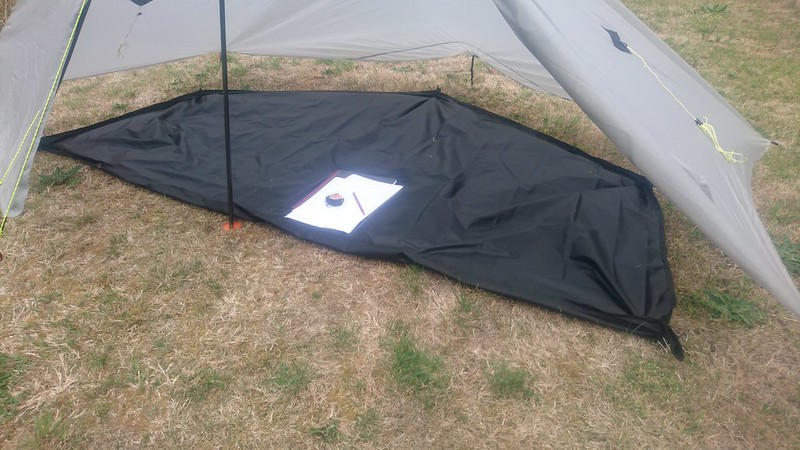
All materials procured and away we go. Marking out the shape of the floor I somehow managed to get one of the dimension wrong This made the width at the head/foot only 700mm not 900mm but still wider than the SMD one. Laying it on the floor it was big enough to accommodate my mat so I hemmed all round and then sewed the corners to form the upstand. Next check it in the tarp for fit, all ok.
So I press on with the top. Working with the net is a pain but I did manage to get the panels cut. The design has a triangular panel for the front into which I inserted the zip and then the rear which is 4 triangles is cut as a single piece to reduce seams. The zipping I had is YKK No.3 but I only had single-sided zip pulls. I have the same zip on a myog bivi and it's fine as I have the pulls on the inside and I only do it up once inside, I figured the same would apply to the net tent.
Having sewn the net panels to the base and then the two corner seams I added a loop to suspend it from the inside of the tarp. The earlier error in cutting the floor meant the net was 'adjusted' to fit by simply trimming off the excess at the corner seam. Some short alloy tubes were inserted into sewn tubes at the groundsheet corners and small loops added to form the tie-outs. Then the test pitch, fit the elastic to the tie-outs to clip onto the inside of the tarp and stand back and admire my work
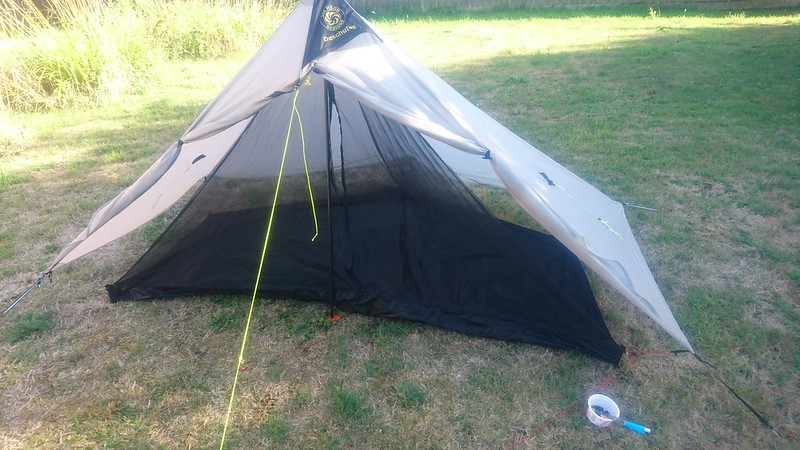
The 'on the fly' adjustment of the net has caused it to have more tension across the corner than up to the ridge, so it cuts the corner and reduces the headroom to about 200mm.
Blast or words to that affect Undeterred I get in and the net does stretch out of the way when inside. The zip pulls on the inside are ok but if you close the zip from the outside it's easy to do it up until the twin pullers are almost touching but then a faff to try and open again. I take it down and pack it away and instead sort my kit for the BAM with Landslide.
I don't have the enthusiasm (or funds or time) to make another before Scotland but come up with the idea to pitch it in the garden and try it. So Friday I head out on the BAM and Saturday I sleep in the garden. Two days without me for Jane. To add to the realism I don't pitch it until after dark. The net does keep the insects out as my head-torch was attracting a fair few but once inside I was safe. Enough room to get the mat and quilt set up and get changed. Once laying down the net does touch my face but I figure this is no worse than being in the bivi with the net done up. In the morning I am inside trying to work out what has affected the geometry to make it tight across the corner. Whilst pulling the net in different ways to tension it I discover that if the rear panel was shorter that it would pull the ends nearly back into shape. So I take it down, sew a fold about 60mm wide across the rear just below the top point, sew a tuck in the side seams to add a touch more tension and add a new hanging loop to match the adjustments and we have
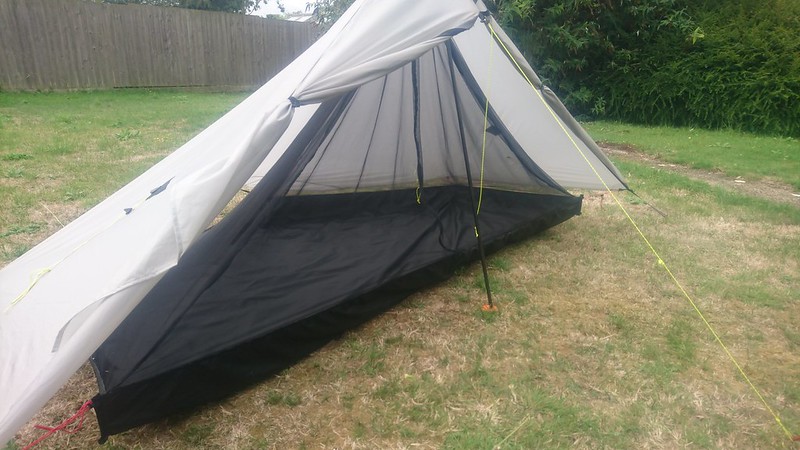
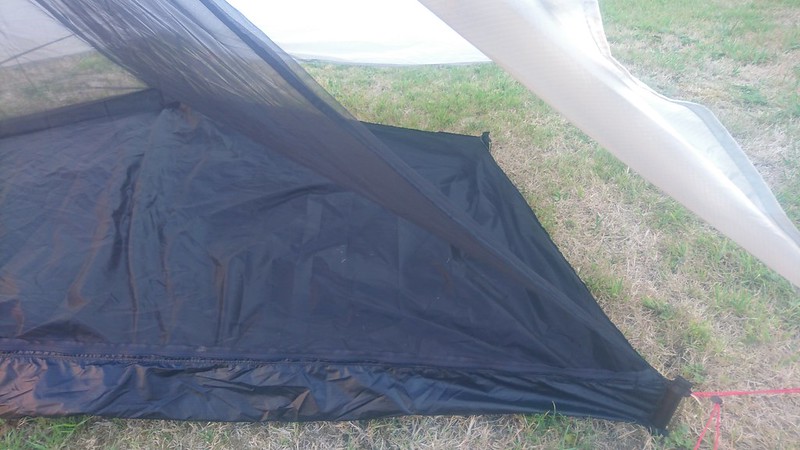
This has lifted the mesh of the end panels up so it no longer hangs into the interior
I think part of the problem was making the rear panel out of a single piece as the tension in the net is hard to control. It would be better with a seam from the rear corners to the point. I used a length of grosgrain up the seams as when I just sewed the two pieces of net together they gathered due to the tension in the thread pulling the holes in the netting together, that that was unpicked and the grosgrain added.
Just need to add a mesh pocket on the inside for my phone and glasses so I can find them in the night and it's done.
So that's the V1 which will be used next month and then perhaps a V2 to be made over winter with-
Floor cut to the correct size
Double sided zip puller
Upper made from 4 panels
I have a Deschutes tarp which down here I use with just my Borah Gear bivi, we don't have the winged death here so it's fine to blow up the mat, get out the quilt and get changed in the open. As I'm off to the land of the 'right to roam' I decided I might want to do something about that. Brushing your teeth whilst running in circles to avoid the midge is one thing but trying to blow up a neoair and run at the same time is a bit much.
I could have just bought the Serenity inner that Six Moon Designs sell but this is only about the size of a sleeping mat. Fine once set up but a bit tricky to sort your gear etc. plus it means that there is a triangular area at the back of the tarp with no access. So I measured the shape of the floor I wanted plus the height then drew it up on the CAD and worked out the sizes of the panels to cut. It would have a bath-tub floor with a 100mm upstand and a midge proof mesh upper. The upstand height was limited by the width of available fabric. The SMD has a 200mm upstand which might be the reason it's narrower, otherwise they would need a seam across the floor.
All materials procured and away we go. Marking out the shape of the floor I somehow managed to get one of the dimension wrong
So I press on with the top. Working with the net is a pain but I did manage to get the panels cut. The design has a triangular panel for the front into which I inserted the zip and then the rear which is 4 triangles is cut as a single piece to reduce seams. The zipping I had is YKK No.3 but I only had single-sided zip pulls. I have the same zip on a myog bivi and it's fine as I have the pulls on the inside and I only do it up once inside, I figured the same would apply to the net tent.
Having sewn the net panels to the base and then the two corner seams I added a loop to suspend it from the inside of the tarp. The earlier error in cutting the floor meant the net was 'adjusted' to fit by simply trimming off the excess at the corner seam. Some short alloy tubes were inserted into sewn tubes at the groundsheet corners and small loops added to form the tie-outs. Then the test pitch, fit the elastic to the tie-outs to clip onto the inside of the tarp and stand back and admire my work
The 'on the fly' adjustment of the net has caused it to have more tension across the corner than up to the ridge, so it cuts the corner and reduces the headroom to about 200mm.
Blast or words to that affect
I don't have the enthusiasm (or funds or time) to make another before Scotland but come up with the idea to pitch it in the garden and try it. So Friday I head out on the BAM and Saturday I sleep in the garden. Two days without me for Jane. To add to the realism I don't pitch it until after dark. The net does keep the insects out as my head-torch was attracting a fair few but once inside I was safe. Enough room to get the mat and quilt set up and get changed. Once laying down the net does touch my face but I figure this is no worse than being in the bivi with the net done up. In the morning I am inside trying to work out what has affected the geometry to make it tight across the corner. Whilst pulling the net in different ways to tension it I discover that if the rear panel was shorter that it would pull the ends nearly back into shape. So I take it down, sew a fold about 60mm wide across the rear just below the top point, sew a tuck in the side seams to add a touch more tension and add a new hanging loop to match the adjustments and we have
This has lifted the mesh of the end panels up so it no longer hangs into the interior
I think part of the problem was making the rear panel out of a single piece as the tension in the net is hard to control. It would be better with a seam from the rear corners to the point. I used a length of grosgrain up the seams as when I just sewed the two pieces of net together they gathered due to the tension in the thread pulling the holes in the netting together, that that was unpicked and the grosgrain added.
Just need to add a mesh pocket on the inside for my phone and glasses so I can find them in the night and it's done.
So that's the V1 which will be used next month and then perhaps a V2 to be made over winter with-
Floor cut to the correct size
Double sided zip puller
Upper made from 4 panels