Yet another frame bag
Posted: Sat Aug 15, 2020 10:38 pm
For a while I kinda knew that one day I'd get round to making a bigger frame bag to replace my Blackburn Outpost, but when the zip on that started to occasionally not close, and a list of other expensive things I "need" to buy, I thought it was time to take the plunge.
I've got a bit of sewing experience, mainly repairing stuff and doing small simple mods, but my usual approach is use strong thread and plenty of it. Brute force, in other words.
I was intending the keep it simple - single space, single zip, webbing ladder round the outside, easy. Then I thought of other bits I wanted to add: hydration port, since I use a bladder in my old bag quite regularly, and loops to hang the bladder from; somewhere to keep a small coil lock since I usually keep it in the external mesh pocket of my old bag; a pocket for a map to keep it out of the way and accessible; loops to hold a pole out of the way at the top, which I also added to my old bag; baffle for the zip - seems like a no brainer since this is the biggest weakness waterproofing-wise (I wasn't intending to make it fully waterproof, but might as well make an effort). I thought about going roll-top, but the big advantage of the frame bag for me is easy accessibility, which I feel that would hugely compromise, so I'll accept the one day I'll need to replace it - at least I know how it's sewn in. I've never had need for an internal divider, but since it's quite a large bag, I added velcro so I can use one if necessary to stop the sides bulging.
I was inspired by this thread: viewtopic.php?f=13&t=17129 - some might say I rather plagiarised it - and this Bikepacking.com article: https://bikepacking.com/gear/how-to-mak ... g-krampus/
I went for 600D PU coated nylon "Cordura" (might have sprung for VX21 but it only comes in two colours, and it would have been really obvious I was copying - black seemed a bit boring) from Pro Fabrics for the main fabric, in "beige" which sounds grim but taken out of the context of a middle-aged living room actually looks quite good IME - plus it already looks muddy. The lining is a lightweight yellow (for ease of finding stuff - another stolen idea) PU coated ripstop nylon. YKK water resistant zip, 50mm polypropylene webbing, and Onewrap for the bladder/pole loops. I added packing foam padding on the tube panels (again, stolen).
I wanted it to fit both my Longitude and Arkose, so I just offered a bit of cardboard up to each frame, drawing both triangles on top of each other, and cut out the shape that fitted both. I just had to stop it short of the Longitude's head tube (no great loss) and a bit above the Arkose's downtube (again, not a huge problem).
Marking up all the different panels on the fabric, with seam allowances, and cutting them out took a huge chunk of time, but doing it as accurately as possible definitely paid off. Once multiple layers of fabric are put together, hemmed, folded, things tend to drift, but everything turned out pretty much bang on.
The most difficult thing was thinking about what order to sew stuff in, so as not to close off access to something, or require stitching through both the outer and lining. Roughly the process was:
Sew the bars on the webbing ladders on, leaving the ends loose to be go into the corner seams
Sew the lock loops on
Seam seal inside both. Press packing foam onto the seam sealer to stick it in place
Sew the map pocket and attach it to the DS lining
Sew the velcro for the divider onto the side lining panels
Sew the lining into the two head tube panels which form the hydration port, and tack them together.
Sew the zip baffle and panel above (inc. lining) onto the zip, and sew the zip onto the main panel (again with lining). Put the zip slider on before I forget it!
All the panels are now ready to stitch together... I think I started from the top tube, sewed both side panels on and worked round, but the order isn't really important at this stage.
I'm really happy with how it turned out. It took a fair few hours, but working methodically definitely helped keeping it all neat and not making any fundamental errors - not saying I didn't make one or two mistakes but nothing that couldn't be undone (there was only actually meant to be one pair of lock loops, but the top one looked a bit close to the zip once I'd sewn it on, so rather than rip it off, I just added another).
The finished product:

It does bulge a little, but this is with a sleeping bag in to test it, and I would normally have more rigid stuff in it. No thigh interference though. The tube panels are 70mm wide.

Lock loops:

Map/drugs pocket. If I'm honest, this is a little tighter than I'd hoped. It took an OS Active map when I sewed it into the lining, but I think sewing it into the seam took a bit out of it. I generally only use a paper map as a backup, so it's mainly to keep it safe and tidy and isn't a huge problem.

Divider velcro. Divider to follow

Hydration port

Inside. I'll probably bind the seams at some point, partly for aesthetics, but the ones either side of the zip do get in the way a bit.

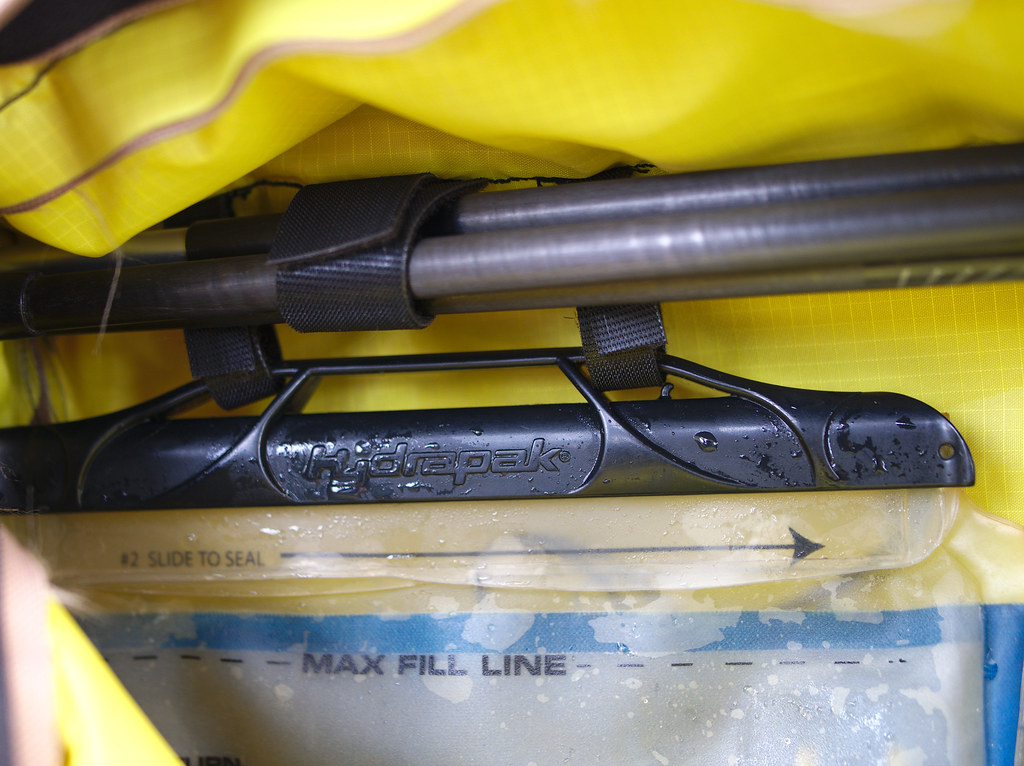
Bladder/pole loops.
On the other bike

I've got a bit of sewing experience, mainly repairing stuff and doing small simple mods, but my usual approach is use strong thread and plenty of it. Brute force, in other words.
I was intending the keep it simple - single space, single zip, webbing ladder round the outside, easy. Then I thought of other bits I wanted to add: hydration port, since I use a bladder in my old bag quite regularly, and loops to hang the bladder from; somewhere to keep a small coil lock since I usually keep it in the external mesh pocket of my old bag; a pocket for a map to keep it out of the way and accessible; loops to hold a pole out of the way at the top, which I also added to my old bag; baffle for the zip - seems like a no brainer since this is the biggest weakness waterproofing-wise (I wasn't intending to make it fully waterproof, but might as well make an effort). I thought about going roll-top, but the big advantage of the frame bag for me is easy accessibility, which I feel that would hugely compromise, so I'll accept the one day I'll need to replace it - at least I know how it's sewn in. I've never had need for an internal divider, but since it's quite a large bag, I added velcro so I can use one if necessary to stop the sides bulging.
I was inspired by this thread: viewtopic.php?f=13&t=17129 - some might say I rather plagiarised it - and this Bikepacking.com article: https://bikepacking.com/gear/how-to-mak ... g-krampus/
I went for 600D PU coated nylon "Cordura" (might have sprung for VX21 but it only comes in two colours, and it would have been really obvious I was copying - black seemed a bit boring) from Pro Fabrics for the main fabric, in "beige" which sounds grim but taken out of the context of a middle-aged living room actually looks quite good IME - plus it already looks muddy. The lining is a lightweight yellow (for ease of finding stuff - another stolen idea) PU coated ripstop nylon. YKK water resistant zip, 50mm polypropylene webbing, and Onewrap for the bladder/pole loops. I added packing foam padding on the tube panels (again, stolen).
I wanted it to fit both my Longitude and Arkose, so I just offered a bit of cardboard up to each frame, drawing both triangles on top of each other, and cut out the shape that fitted both. I just had to stop it short of the Longitude's head tube (no great loss) and a bit above the Arkose's downtube (again, not a huge problem).
Marking up all the different panels on the fabric, with seam allowances, and cutting them out took a huge chunk of time, but doing it as accurately as possible definitely paid off. Once multiple layers of fabric are put together, hemmed, folded, things tend to drift, but everything turned out pretty much bang on.
The most difficult thing was thinking about what order to sew stuff in, so as not to close off access to something, or require stitching through both the outer and lining. Roughly the process was:
Sew the bars on the webbing ladders on, leaving the ends loose to be go into the corner seams
Sew the lock loops on
Seam seal inside both. Press packing foam onto the seam sealer to stick it in place
Sew the map pocket and attach it to the DS lining
Sew the velcro for the divider onto the side lining panels
Sew the lining into the two head tube panels which form the hydration port, and tack them together.
Sew the zip baffle and panel above (inc. lining) onto the zip, and sew the zip onto the main panel (again with lining). Put the zip slider on before I forget it!
All the panels are now ready to stitch together... I think I started from the top tube, sewed both side panels on and worked round, but the order isn't really important at this stage.
I'm really happy with how it turned out. It took a fair few hours, but working methodically definitely helped keeping it all neat and not making any fundamental errors - not saying I didn't make one or two mistakes but nothing that couldn't be undone (there was only actually meant to be one pair of lock loops, but the top one looked a bit close to the zip once I'd sewn it on, so rather than rip it off, I just added another).
The finished product:
It does bulge a little, but this is with a sleeping bag in to test it, and I would normally have more rigid stuff in it. No thigh interference though. The tube panels are 70mm wide.
Lock loops:
Map/drugs pocket. If I'm honest, this is a little tighter than I'd hoped. It took an OS Active map when I sewed it into the lining, but I think sewing it into the seam took a bit out of it. I generally only use a paper map as a backup, so it's mainly to keep it safe and tidy and isn't a huge problem.
Divider velcro. Divider to follow
Hydration port
Inside. I'll probably bind the seams at some point, partly for aesthetics, but the ones either side of the zip do get in the way a bit.
Bladder/pole loops.
On the other bike