Iron Raft packraft build
Posted: Sat Aug 04, 2018 8:19 pm
OK, I’ve finally started work on my Iron Raft packraft kit.
After practising sealing using the Jamara Pro Star heat sealing iron on a few scraps, I worked out the right setting to melt the TPU - basically almost full power.
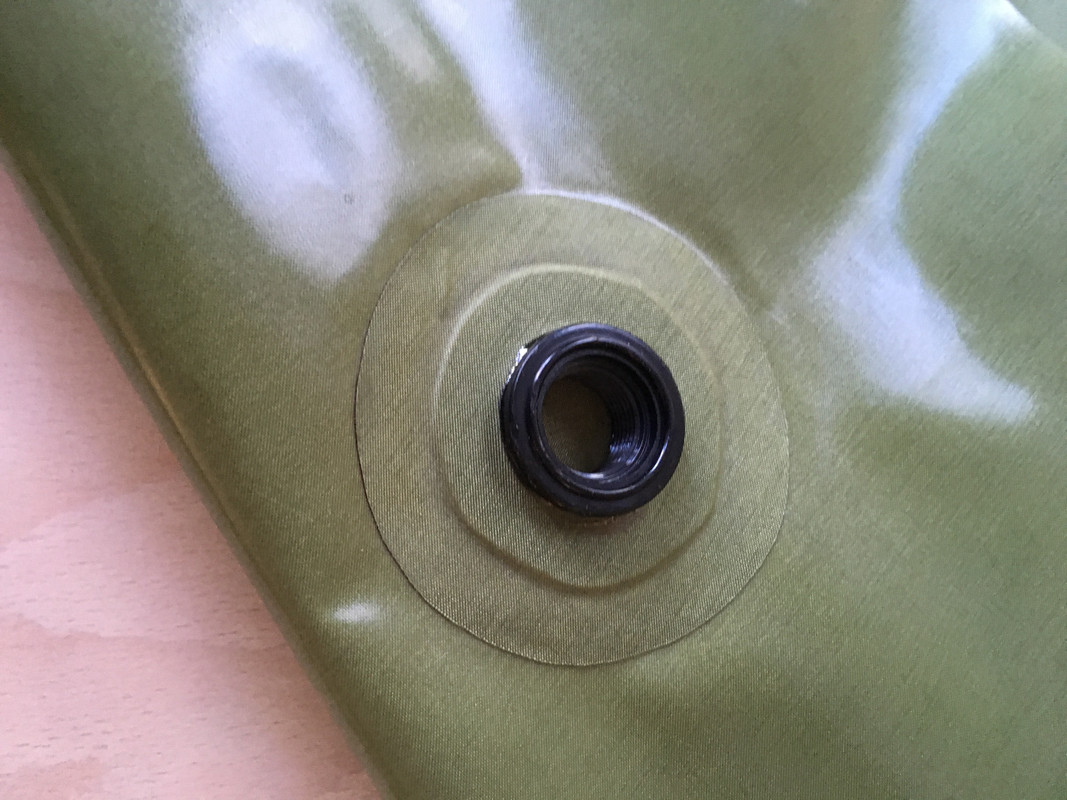
Then the first proper job was to cut out the hole for the Boston valve and a circle of fabric with another hole in the centre to seal it.
The circle and the position of the valve are pre-marked but the actual valve holes aren’t. Nonetheless, it’s easy enough to mark and cut them out.
First of all the valve itself is roughened and glued to the fabric with the supplied glue. I cut a 45mm hole in a couple bits of scrap ply to hold the fabric against the flange while it dried. Then, the next day, the bigger ring of TPU material is ironed to seal the whole thing up.
The next step feels a lot more serious - sealing the tubes to the floor. Before starting I decided to buy a big sheet of 9mm ply to sit on top of our table, both to protect it and give a bigger working surface.
This was a good move. Getting all the tubes lined up is a bit fiddly, especially if they’re trying to slide off the table. I used masking tape to hold them in place before sealing, which worked pretty well.
It’s definitely painstaking work to get a really good seal with no lifting edges. You just have to take your time.
Most of my seams look pretty well aligned but the very last one is a tad gappy, maybe a couple of mm. I’m hoping that’ll adjust out as I work down the tube seam and will at any rate be covered by the seam strip.
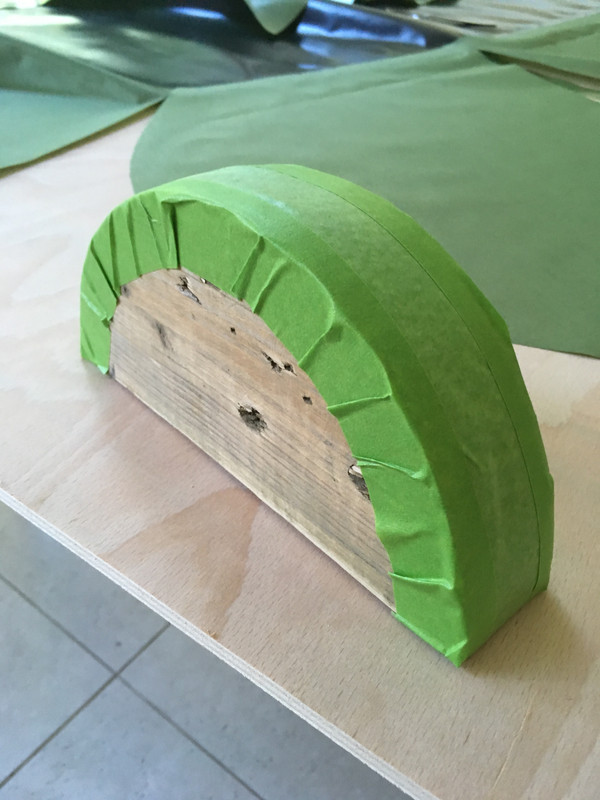
The next step is to start sealing the tube seams. The Iron Raft site suggests a heatproof bowl as a base for this but I don’t have one so I’ve made a curved former out of an old bit of 2x4. A guy on the DIY Packraft forum suggests this is a better tool anyway. We’ll see. (I used a side plate as a template for the curve.)
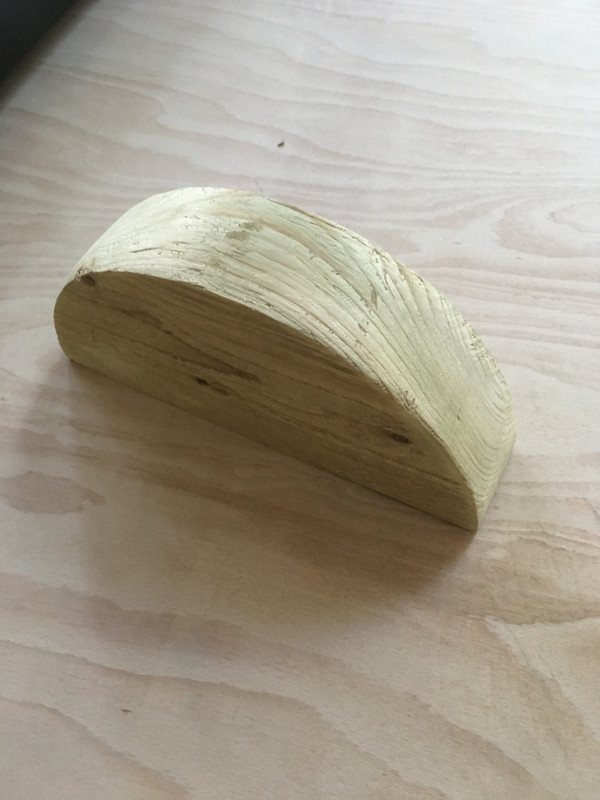 image uploading
Total time so far: probably about four-five hours. You get quicker as you learn how to use the iron but the tricky bits are yet to come.
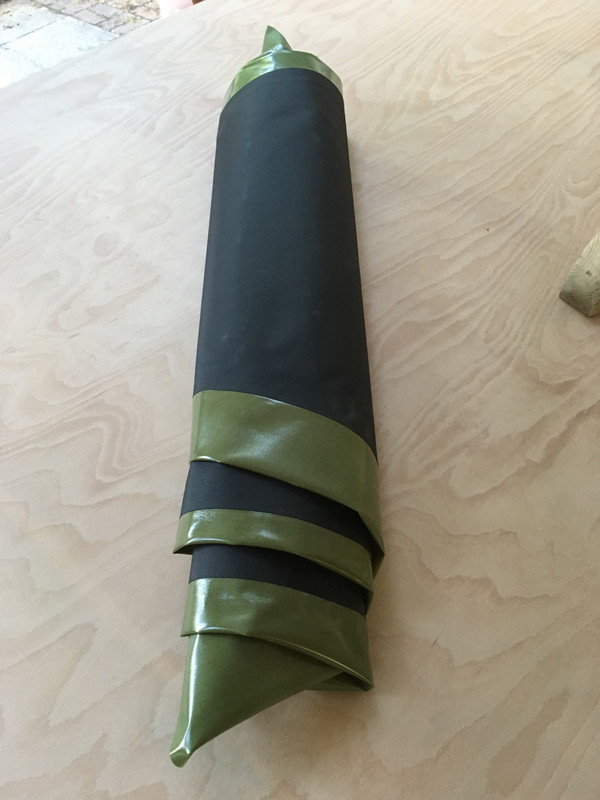
Here’s the raft so far, rolled up. Pretty light and packable.
After practising sealing using the Jamara Pro Star heat sealing iron on a few scraps, I worked out the right setting to melt the TPU - basically almost full power.
Then the first proper job was to cut out the hole for the Boston valve and a circle of fabric with another hole in the centre to seal it.
The circle and the position of the valve are pre-marked but the actual valve holes aren’t. Nonetheless, it’s easy enough to mark and cut them out.
First of all the valve itself is roughened and glued to the fabric with the supplied glue. I cut a 45mm hole in a couple bits of scrap ply to hold the fabric against the flange while it dried. Then, the next day, the bigger ring of TPU material is ironed to seal the whole thing up.
The next step feels a lot more serious - sealing the tubes to the floor. Before starting I decided to buy a big sheet of 9mm ply to sit on top of our table, both to protect it and give a bigger working surface.
This was a good move. Getting all the tubes lined up is a bit fiddly, especially if they’re trying to slide off the table. I used masking tape to hold them in place before sealing, which worked pretty well.
It’s definitely painstaking work to get a really good seal with no lifting edges. You just have to take your time.
Most of my seams look pretty well aligned but the very last one is a tad gappy, maybe a couple of mm. I’m hoping that’ll adjust out as I work down the tube seam and will at any rate be covered by the seam strip.
The next step is to start sealing the tube seams. The Iron Raft site suggests a heatproof bowl as a base for this but I don’t have one so I’ve made a curved former out of an old bit of 2x4. A guy on the DIY Packraft forum suggests this is a better tool anyway. We’ll see. (I used a side plate as a template for the curve.)
image uploadingTotal time so far: probably about four-five hours. You get quicker as you learn how to use the iron but the tricky bits are yet to come.
Here’s the raft so far, rolled up. Pretty light and packable.